Sunday, April 14, 2013

P52 Update - Weeks 10-14

I've learned something about myself while doing this P52 so far - I can stay pretty on top of taking the photos (even if it's on the last day of the week) but I am awful at posting them or blogging them in a timely fashion.  I think I need to work on this as the year goes on.

Anyway, it's time for an update on the weeks that I've missed so far. It's been a busy few weeks, working on a bunch of different projects, and having the opportunity to take photos for 2 different theatre productions.  Things are busy and crazy, which is great because that means I can pay my rent and save up to buy more photography toys (70-200 2.8 VRII I'm looking at you!)

Here we go.

Week 10 - Movement - Ripples taken at the Coal Piers shoot I did with some local CM members. A sort of loose interpretation on movement, but I'm ok with it


Week 11 - Night Portrait - Here we have Row, lit by an iPad and her laptop making faces at me.  I don't think she was feeling being photographed that night


 Week 12 - Signs of Spring - While visiting my parent's house I stepped outside and saw this planter, mid gardening.  I'm so excited for winter to be over, even though I live in a city and there isn't all that much green growing things.

Week 13 - Blue - One of the shows I got to take pictures of, Rent, featured some great blue light and awesome electric blue hot pants.


Week 14 - Bloom - A lot of people in my P52 group used gorgeous flower macros for this week, but a) that's not my style and b) I didn't have any flowers.  I even went to the park to try and find some nice growing things, and couldn't find anything.  I love this corner market though and figured the flowers outside totally count as blooms.

Woot, now I'm all caught up.The weather is gorgeous out, so maybe I'll have some other great and fun and interesting things to post soon!

Monday, March 11, 2013

Philly Coal Piers

Yesterday I got the opportunity to do something awesome and different for me - I met up with other photographers in the area and headed to an awesome location in Philly to do a photoshoot.  The Coal Piers are off the beaten path, and definitely a little interesting to get to, but it was so worth it.  We went down a dirt road, turned the corner, and encountered this graffitied abandoned structure right on the river with beautiful light and things to climb on and lean against.

The location was awesome, everywhere you turned there was something different, and a totally different feel.  We had a few models along who were incredible and beautiful and a total joy to take pictures of.  It was a new experience for me, to get to pose people, and I definitely learned a lot from watching some of them ore experienced girls.  Overall, a total blast.  Here's a selection of my shots from the day.  Which are your favorites?

(click the image to see larger)

Friday, March 8, 2013

Flounder in Parchment

Hey there friends!  I'm back with a recipe this time.  Sometimes, (ok, most times) after eating lots of junk/bad food, I get the desire to go back to basics and eat something simple but tasty.  Last night, I finally had some time to cook.  Unfortunately, I didn't really have much food in the house since I haven't been around to go grocery shopping.  Thankfully, we've been doing pretty well though with keeping some stuff in the freezer, and keeping certain dry goods on hand so there was enough for me whip something up with a little creativity.

I made this with flounder fillets (first time cooking flounder actually), but any sort of thin mild fish (like tilapia) or thin chicken breast would work equally well.  This also could be a great dish for a dinner party since the presentation is pretty, without it taking any additional effort.  That's always a win in my book.  This turned out really tasty and definitely was a nice pick me up after the past few weeks of eating out. Here we go:

Flounder Cooked in Parchment
Serves 2
Ingredients:
(2) thin fillets of flounder (or other fish/chicken) (4-6 oz each)
(1-1/2) TBS Olive Oil
Few sprigs of rosemary (or your preferred herb)
(4) thin Lemon slices
(1/2) Cup white wine
(2) Carrots thinly sliced
(1) Medium onion thinly sliced
Salt and Pepper
(1/2) Cup dry Quinoa
(1) Cup Water

To Do:

- Preheat the oven to 400 degrees F
- Put the quinoa and water in a small pot on the stove and cover.  Turn the stove to high heat until the water comes to a boil.  Once it's at a boil, lower the heat so it's just simmering.  On my gas stove this means I take the heat down most of the way. (If I was Anne Burrell on Worst Cooks I'd be chanting "Bring to boil, reduce to simmer"and dancing, but I'm not, so obviously I don't do that. Right.)  Keep an eye on it, but around when the fish is done all the liquid should be absorbed by the quinoa, rendering it done.
- Slice your carrots and onions and lemon
- Grab 2 pieces of parchment paper or aluminum foil, about 9"x12" each.  Fold them in half, like a book.  If we were comparing types of folds, this would be a hamburger fold, not a hot dog fold
- On one half of each parchment drizzle some of the olive oil, then sprinkle some salt and pepper
- Lay each fillet on top of the oil, moving it around and flipping it over so the oil and seasoning gets on both sides
- Place the fish in the center of the parchment side.  Place your carrots and onions on top of the fish.  I like to spread them out over the whole fish so it's covered.
- Take (2) lemon slices for each fish, and put them on top of the carrots and onions.  Then take some of the herb sprigs and place them around the lemon. (If you keep the herbs on their stems it's easier to remove after cooking so you don't get a mouthful of overpowering herb)
- Pour half the wine over each fish
- Now we create the packets.  Fold the one side over the fish, then fold/roll the 3 remaining sides so they stay closed and enclose the fish.  You want it to stay closed so the fish gets cooked by a combination of steam and baking.
- Put your 2 fish packets on a baking sheet and place them in the middle rack of the oven.  Set your timer for 15 minutes
- Once the fish is done cooking, place some quinoa on each plate.  Give each plate a fish packet, let sit for 2 minutes, and then carefully unwrap.  Enjoy the steam that rises, and bite into your tasty fish

And now some photos!


I hope you enjoy!  Let me know how yours turns out.


Tuesday, March 5, 2013

Shooting 101 Course at Clickin Moms

Yesterday I mentioned sharing photos from the Shooting 101: Best Darn Beginner Course class I took on Clickin Moms this past month.  Don't let the name shock you, I haven't magically/randomly become a parent yet.  However, this site/forum/classes has provided a great photography community geared towards women (most of whom are moms, but it's not required thank goodness) and features tons of great tutorials and other useful information for taking your photos to the next level (and I am most definitely not paid to say that).

I decided to take this Shooting 101 course because I wanted to make sure I really had all of my basics down.  I've been shooting in manual since the summer, and I understood a lot of the basics (Exposure Triangle, basic composition, importance of white balance) but I knew there were some gaps missing.  I wasn't nailing all of my photos in camera, and definitely required a lot of lightroom editing to fix wonky white balance.  This class has rave reviews and I figured it was worth it to figure out where I stand and see what I should focus on learning next.  Here's where that crazy unpredictability of my life comes into play.  I figured February would be a good time to take the class since typically it's a slow month for theatre and corporate events.  So I signed up thinking I'd have lots of time to complete the assignments. And you can guess what happened...I ended up very busy, and actually out of town for 2 of the 4 weeks.  I pushed through it though, and managed to turn in an assignment every week.  If you're considering an online class to really learn to use your SLR, I would highly recommend this one. Lynne Rigby, the instructor, provides great feedback and all of her materials are informative (plus her kids are really cute) and the community of fellow classmates made it a great experience for me.  I can't wait to take another workshop, the question just becomes what to try next.

Anyway, I thought it would be fun to share some of the pictures I used for the class, which not only shows my progress, but also gives an idea of how I've been spending the past month.

Week 1 - Taken in DC while working an event in a hotel. The only time I went outside was to get the picture since I needed one with outdoor light.


Week 2 - It turns out I can get some great window light in my room, which is nice since most of my apartment has no windows!


Week 3 - A combo of gymnastics and my trip up to Syracuse (Go Orange!!!). For purposes of this blog post I did fix the White Balance on the gymnastics one.  I forgot to change it in camera and she was a little blue.  This 2 second fix makes me like it better


Week 4 - Also taken in a hotel, cause work can be crazy like that.  I fixed the WB here too for blog purposes.  But I love how blue her eyes are.

And there you have it!  I hope you enjoyed, and maybe I've encouraged you to check out and take a workshop.  Feel free to ask me any questions and also to leave any feedback :)
Until next time....

Monday, March 4, 2013

P52 - Weeks 6-9

Wow.  Long time no blog.  It's been a crazy month work wise, I've felt a bit like a pinball bouncing between different cities for work.  I'm sorry I've been neglecting this space, but it's been all I can do to make sure I even get my photos taken, let alone posted.  Also, I took a Shooting 101 course over at Clickin Moms and it's been crazy getting those assignments done.  Don't worry, I'll post my progress from that course soon!  Also to anyone looking for recipes, hopefully I'll be home a bit more this month and will have time to cook and thus post some of the things I make.  I miss making tasty things for dinner and having a good lunch - chinese and pizza gets old very quickly, especially when you want to be healthy but long work days don't quite allow for creative lunching (or you have no say in what's provided).

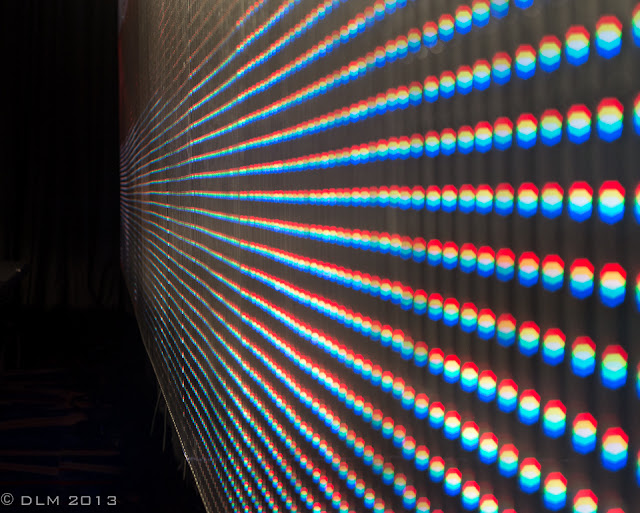
Anyway, what you really come here for, the photos! (Or you like listening to me ramble, but for some reason I doubt that).  The theme for Week 6 was texture.  I took this photo while working on an event in Washington DC.  At the back of the stage was a large LED wall and it made for an interesting texture.
Week 6 - Texture

Next up, Week 7, where the theme was Symmetry.  This fell around Valentine's Day, and I thought this heart fit the theme perfectly.  I know it's upside down, but I still think it gets across the idea of being a heart and expressing love.


Week 7 - Symmetry

Week 8 brought us the theme of Shadow.  I was a little stumped on this one since I wanted to be creative and not just take a picture of my shadow outside, or have a photo where shadows fell across someone's face awkwardly.  Then I found this shot I took of my fireplace with fire blazing and realized it could totally work! I thought it was funny that this was only the 2nd time I've used the fireplace in my apartment, and I did it unintentionally for the picture.  But hey, I'm totally going to take it.
Week 8 - Shadow

And finally, to catch us up, here's Week 9 - Glass.  This one came about at the end of a very long work week, where at the end up the day we'd been aiming colored lights at a beautiful chandelier in the center of a hotel ballroom.  On my way out, I went to the lobby where you could look down on the chandelier, and there were these beautiful glass beads hanging around them.  I couldn't resist and grabbed my camera to capture the beads with all the color and reflection.  I hope you like it as much as I do!
Week 9 - Glass

And that's where I am right now. This week seems a little calmer (famous last words, I know) so stay tuned for a post about my Shooting 101 course!


Saturday, February 2, 2013

P52 Week 5 - Low Light Photography (plus Gymnastics!)

Have you ever had it happen where you're in a situation and think "ooh this would be such a perfect photo" and then regret you're doing something that stops you from being able to capture it?  That would have been the case for this week's picture for the P52, except I happened to hit a red light, and my camera was in my gym bag next to me.

I guess I should back track.  I was driving on my way to gymnastics, heading up Broad St (in Philly) and saw City Hall all lit up.  I pass this every day, especially if I'm driving home from work, or trying to leave the city, but I've never taken pictures at night. (Fun fact, it seems like everyone who gets married in Philly takes pictures standing on the center median of Broad St during the day so they can get pictures in front of City Hal).  Anyway, it looks very cool, especially with the colored lights from surrounding buildings, and I realized this would be perfect for the theme - Low Light Photography.  Only one slight catch - I was in my car.  Driving.  And pulling out a camera, futzing with the dials (since I shoot in manual) and framing a shot just isn't a safe thing while operating a moving vehicle.  Luckily for me, and the photo, the light turned red.  Giving me just enough time to flip the camera on, bump my ISO and go for it.  No time to take a few different shots to get exposure right, I just had the opportunity for the one.  And when I imported it tonight, I loved it.

(Settings - ISO 6400, SS 1/320, F 4.0)

This is another example of why I love my D600 - my old camera would never have handled this well in low light and I never would have been able to get this shot.

So I got a nice photo, however, my night was just beginning.  I headed to my adult gymnastics class, tripod and camera in tow with the hope of getting some cool action shots.  Hopefully soon I'll have some other ones to show you (including a composite image of me tumbling), but here's what I got tonight.  The first 2 were taken by me using the tripod.  The 3rd was hand held.  And the 4th, is actually me!  Taken using the tripod and the self timer set to intervals so I could try and get myself flipping.  I'm hoping to get to play more with this soon.

So here we go.  First up, the Cheerleading tumbling kids (1st is a layout full, 2nd was part of a triple full attempt)


Next up, one of the adults in my class, mid Back Tuck:

And finally, me.  Not my best back tuck, but given I was trying to get the timing right, it worked out pretty well.


I'm definitely looking forward to play more in the gym.  I know I need to work on getting things a little sharper (hard with how fast flipping is), and I wish I had a better backdrop, but I work with what I can :) Does anyone have any tips for action photography when you can't adjust the bad gym lights (or use a flash since that's dangerous)??

Until next time...


Monday, January 28, 2013

P52 Week 4 - Weather

And I'm back!  This week I give you week 4 of P52, with a theme of weather.  I put off doing this one until late in the week because I heard we were getting snow.  I think this is one of the few times in recent years I was excited for snow.  Spending 4 years in the frozen tundra known as Syracuse kind of put a damper on the snow loving, since there's snow/ice on the ground for close to 9 months a year sometimes.  Also, here in Philly, people have NO IDEA how to drive in snow.  Which makes my life very frustrating since I a) have lots of snow driving experience, and b) still need to drive places here even when it's snowing.

BUT, on this lovely Friday, there was a light bit of snow.  And I didn't have work, so no driving needed. AND, snow is much more conducive to a photo about weather than just the disgustingly cold gray weather we had the rest of the week.  So, I bundled up in true Cuse fashion, giant puffy coat and all, and wandered down my block to try and get some good shots.  And here are my favorites.

First up, the photo I chose for P52 this week.  I found this cute puppy out on a walk and needed to capture it.


And here are 2 others that captured the weather for me :


And there's some weather for the week.  Next up we get Low light - which is perfect for me since those are the conditions I find myself in pretty much all the time.  Do you have a favorite of these 3 weather shots?  Let me know in the comments :)
Until next time, have a lovely week!

Saturday, January 19, 2013

P52 Week 3 - Shallow Depth of Field

This week's theme was right up my alley - I love shooting wide open or with a shallow DOF.  If you're not familiar with Depth of Field, it's what portion of the picture is in focus.  So a shallow DOF has a small portion of the picture, typically the foreground, in focus and then the rest of the picture nicely blurred.  I love the look of a nice soft background with your target object/person all sharp.

The grey disgusting weather we've been having has left me a little lacking in the inspiration or ability to shoot outside with lovely light.  But the week is coming to the end, and I'll be out of town for business for the rest of the photo week (each theme starts on Tuesday), so I needed to pick something today.  Still inside, but today Row and I decided to make the Gooey Cinnamon Squares from the Smitten Kitchen Cookbook.  I'll try and make them again and write up the recipe/any changes for you guys and take pictures since mine didn't come out very pretty this time.  It did give me a great photo opportunity though, with the best part of baking - licking the beater/spoon.  Here you go:


I'm definitely starting to do more with photography - getting the opportunity to shoot some theatre productions as well as the events I work on.  Hopefully I'll keep improving the skills I've been working on and get to add to my photography toolbox when I take my first online workshop next month.  All of this means more posts from me - definitely with photography, and hopefully also with some new recipes.
And now I go eat some of the baked goods we made (picture a snickerdoodle cookie turned into a gooey cake.  Yeah, they taste as good as that sounds)!  Thanks for stopping by!

Friday, January 11, 2013

P52 Week 2 - Silhouette

Hey there

It's time for another post in my Project 52.  This week the theme is Silhouette which was interesting, since here in PA it's kind of hard to get pretty lighting in the middle of winter, in the middle of a city.  But, I refuse to give up this early in the project and so I persevered and made an attempt in my apartment, without benefit of natural light.  This also would become my first self portrait attempt (using my self timer) since I was home alone.

Also, as I set up to take this shot (clearing some of the debris of the living room and shifting some lamps) I was confronted with the fact that a) my tripod was in my car.  Which was 2 blocks away.  And it was raining.  And b) I was trying to create backlight using 2 floor lamps and needed something to diffuse the light so it wasn't a bunch of ugly bright bulb hot spots.  Enter creative solutions to the rescue.  First, let's look at the finished shot I came up with.


Next, let's take a look at how I made this shot happen:


Yes, that is an empty can (formally housing crushed tomatoes from my last soup) sitting on a book sitting on a chair, aka makeshift tripod.  I put my camera vertically sitting so part of the grip sat inside the can to keep it stabilized.  Then I leaned over, focused the shot and hit the timer and ran to get into place.  Here's a pullback so you can see the entire setup:


Please forgive the mess.  I probably should have staged the shot better, but this is reality not some awesome studio.  And there you have it.  Makeshift softbox created by putting my chef's coat around a floor lamp (one of the ones with 5 adjustable heads) and another lamp sitting below it.  And an awesome chair/tin can makeshift tripod.  Overall, I'd call it pretty successful for working with what I have.  Next up, preparing for next week's shot - Shallow Depth of Field.

Hope you've enjoyed - Do you have better ideas for creating a makeshift softbox?

Thursday, January 3, 2013

More Mummer's Photos

Hi friends!

I attempted to put together another collage, using more of the photos I took at the Mummer's Parade.  One of the things I love about the parade is how vibrant it is - I love seeing all of the costumes they put together, especially for the String Bands division.  I think taking photos while at this parade is one of the tings I look forward to most all year.  Not only because of the fun and the colors and the atmosphere, but also because as spontaneous emotive shots go, the expressions I can capture at the parade are so awesome.

It was also fun using my new camera this year and trying out a heavier zoom lens than I was used to.  Maybe by next year I'll have my dream zoom (the 70-200mm 2.8 with VRII) and be able to get things even sharper and more of a range with the depth of field.  But anyway, enough technicalities.  Here's the collage:


Which is your favorite shot?  I'd love to hear which ones people gravitate to :)

Thanks for visting!

Wednesday, January 2, 2013

Photo Project 52 - Week 1

Hey there friends, long time no posting.

I have lots of food things I've cooked recently that I need to put up here (homemade stocks and lots of soups, as well as some roast chicken things), but until I get around to getting them all typed up and pretty for you, I thought I'd start the new year off with another project I'm working on.

I'm part of a community called Clickin' Moms (even though I'm not a mom, it's an awesome site/forum) and it's inspired me to start a Photo Project 52 - taking a photo a week for the entire year.  The group I'm in is doing a suggested theme as well, and I'm going to do my best to keep up with it each week.  Hopefully posting here will help keep me accountable and on track.

So, without further ado, here is my Week 1 Photo, for the theme "New Years".  Photo taken at the Philadelphia Mummer's Parade of the Woodland String Band.